
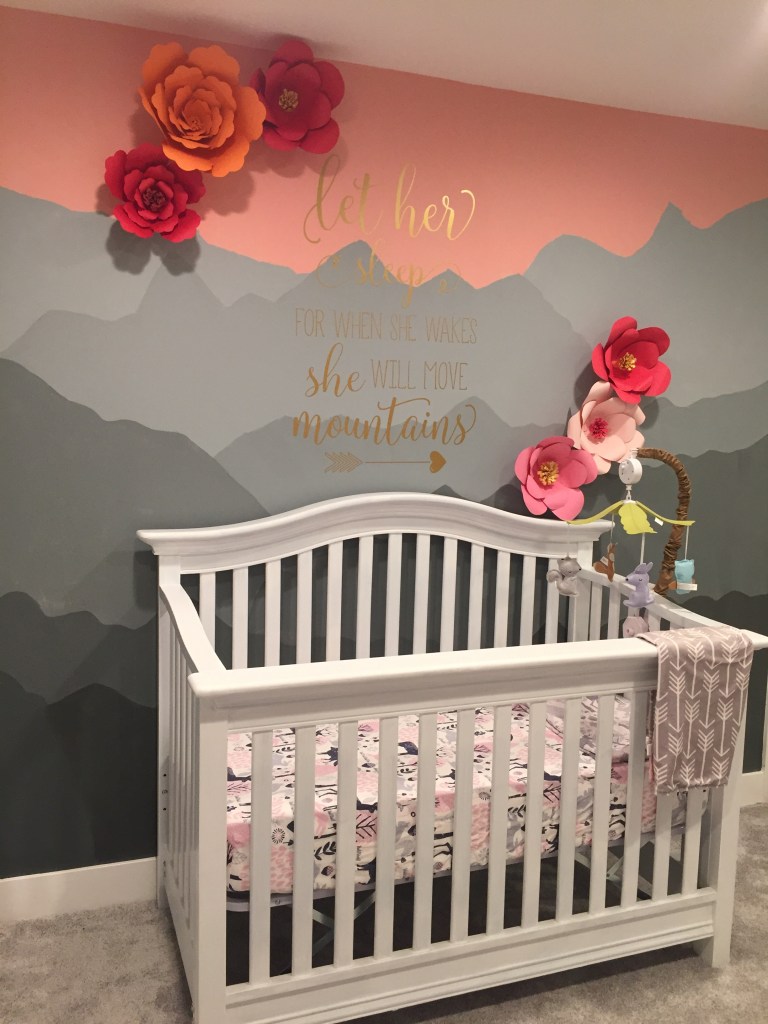
I really wanted to put a personal stamp for our first baby’s nursery. I saw a timelapse on Instagram of a couple painting a mountain landscape and it seemed right up my alley! My husband thought it would be way too hard but I had broken down the steps in my head and it seemed like something we could pull off so we went for it!
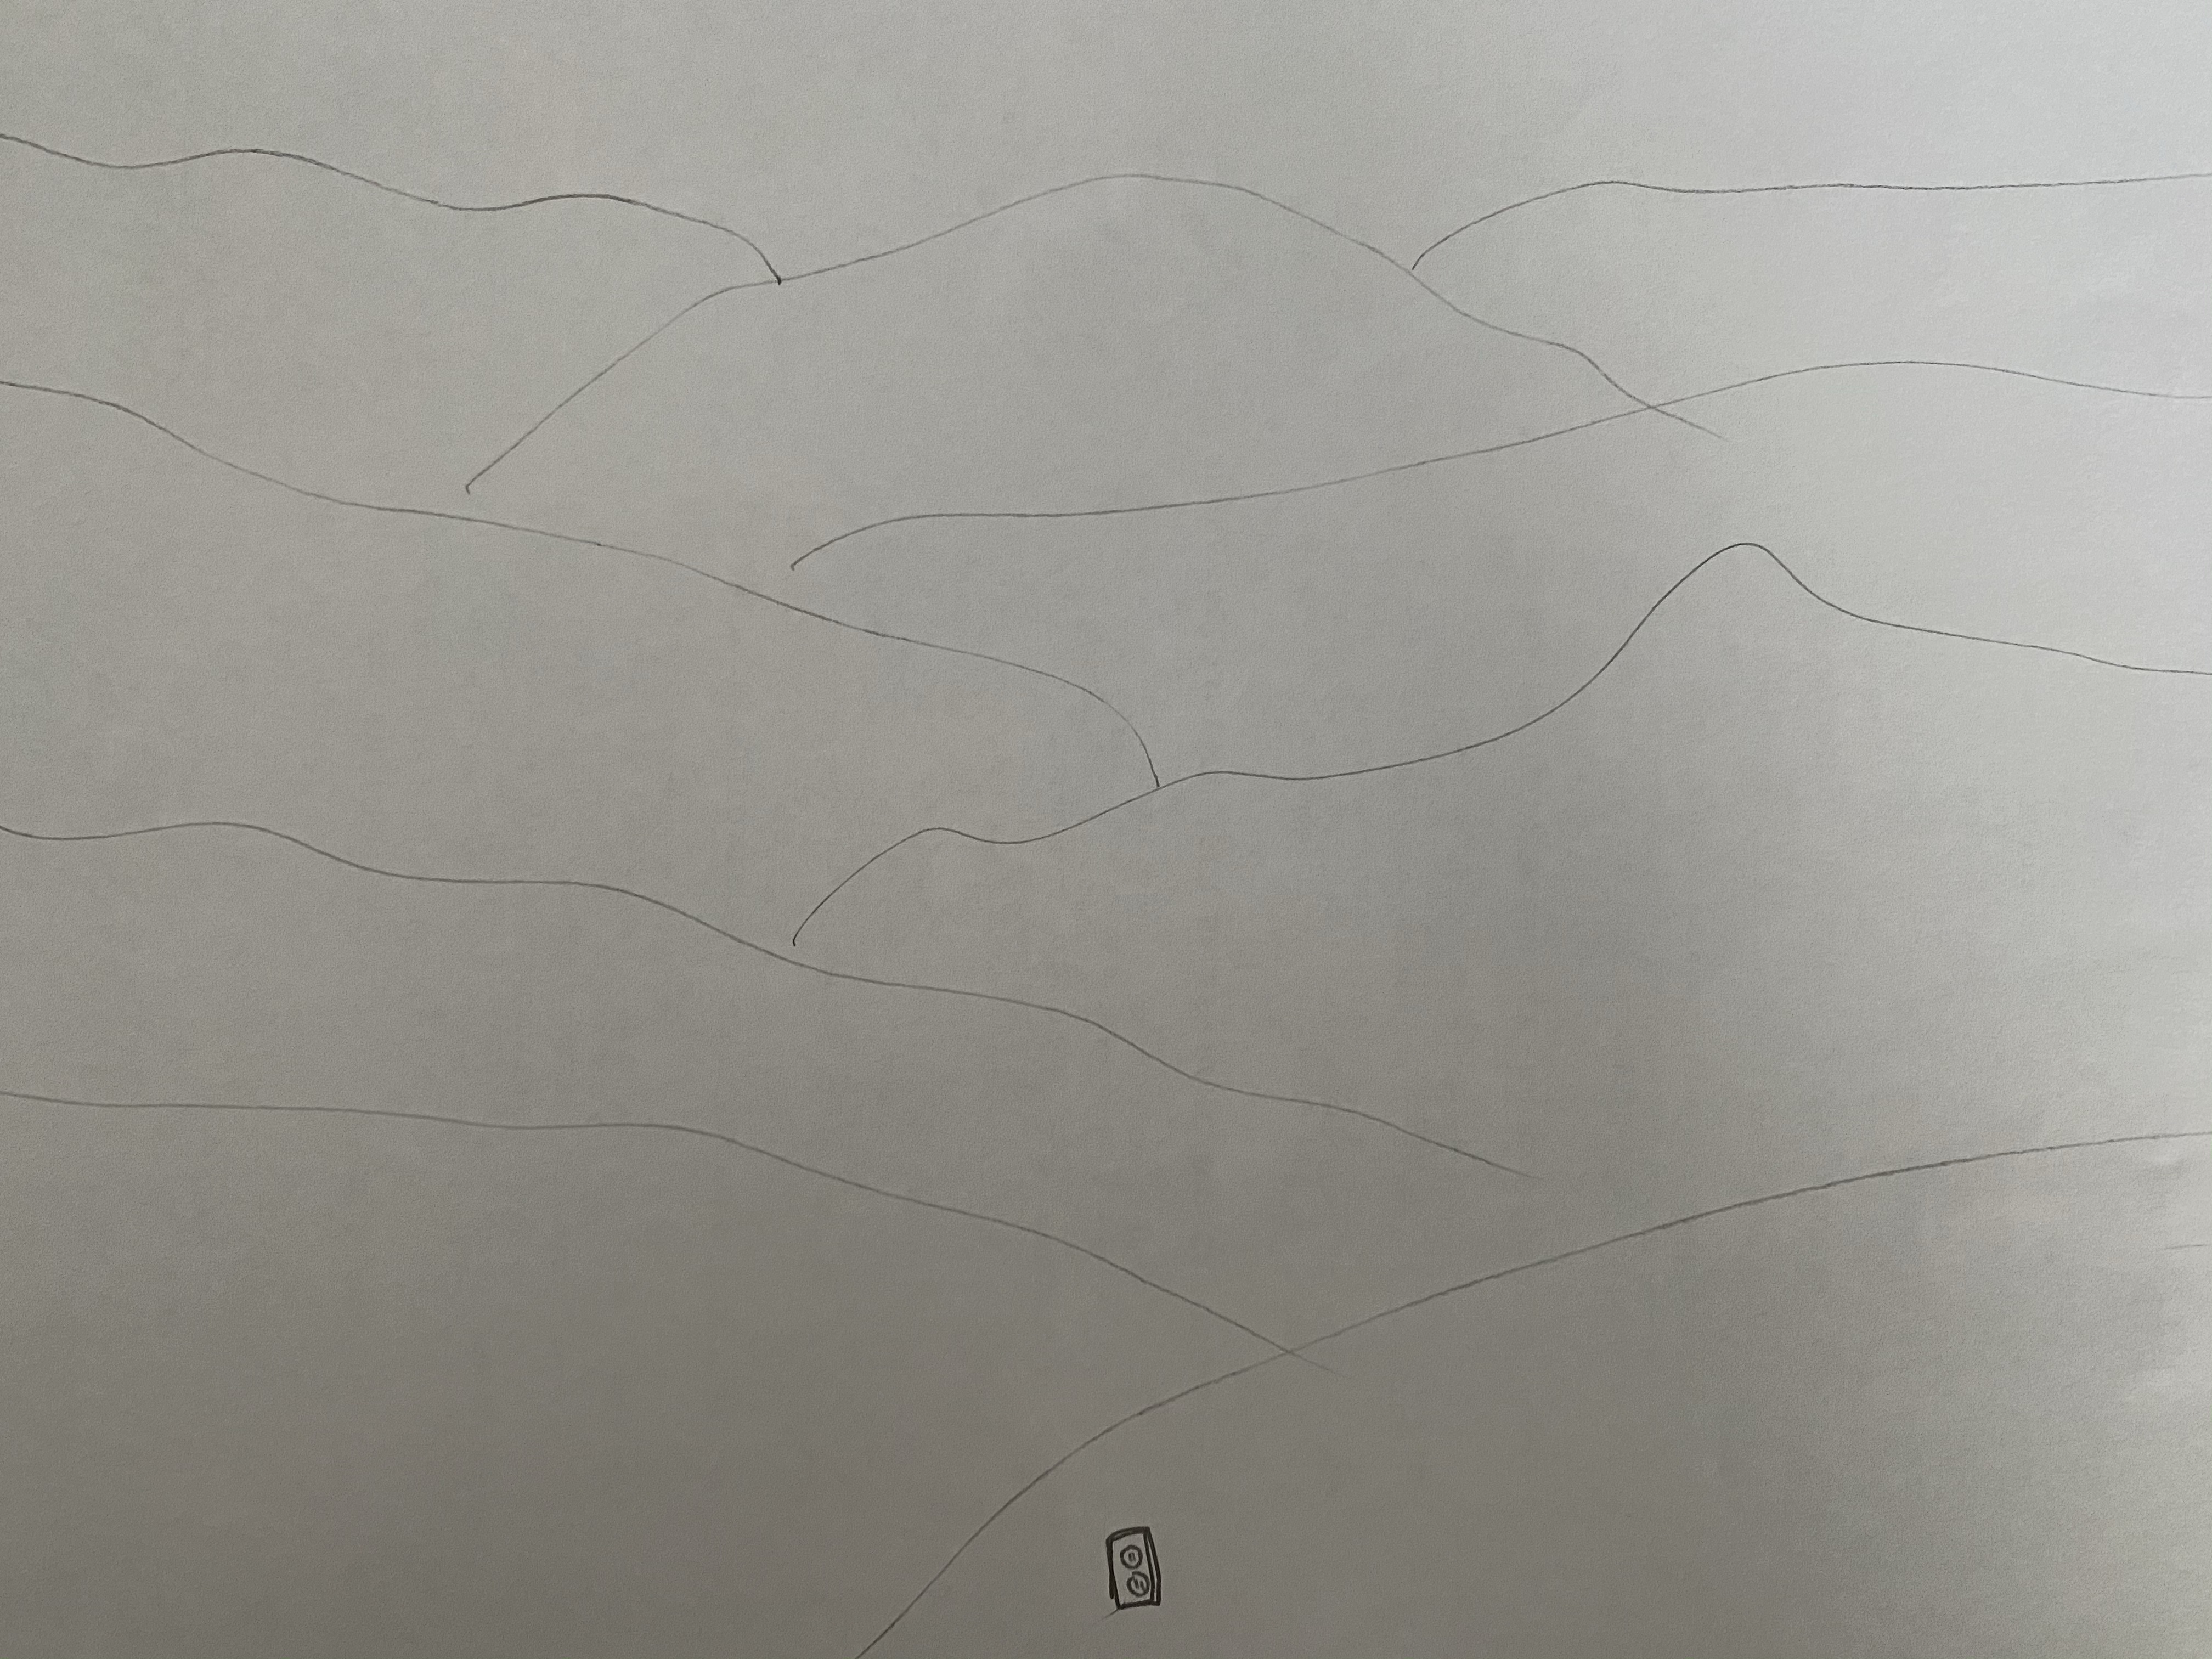
First, we needed to draw out the mountains. I started with the bottom right mountain first: started at the bottom edge of the wall, about 1 ft left of the outlet and squiggled an ascending line to the right edge of the wall (ended about 1/4 of the way up the wall). The left mountain started at the same height on the left edge of the wall, squiggled down to meet the mountain that was already about a foot from the bottom edge. Did another left side mountain parallel to this mountain just about a a foot of separation between two. Next mountain started on the right, tried to get crazy and create a “mountain peak” out of one my squigglies (didn’t turn out that great, wouldn’t recommend) and met the right mountain top. The main idea here is to have overlapping mountains that are descending behind each other. Drew another layer on the right and another layer on the left before I stopped to plan out the final two layers. These were the most important because after we put the crib in front, the final two layers would be the most visible and set the “tone”. I drew one mountain in the middle of the two prior layers and one more left mountain and more right mountain. All of these layers equated to 8 distinct mountain ranges.
The next step was to mix the paint to create 8 distinct colors of gray. The higher (or further in distance) the mountain, the lighter the gray. The lower (or closer in distance) the mountain, the darker the gray. This took a little bit of experimenting and adjusting as I mixed the paint to get the perfect color so no exact measurements available here. I started with 8 cups and labeled them 1-8. I poured 3/4 cup of gray in cup #1, #2, and #3, poured 1/2 cup of gray in cup #4 and #5 and poured 1/4 cup of gray in #6, #7 and #8. I then had to add white to get a gradient between the 8 cups and this is where it became an experiment. I started with cup #8 which was going to be my lightest gray and added the most amount of white I needed to get the lightest gray I wanted (no measurement, just mixed until it looked right). I did the same with #7 but stopped pouring the white right before it started to look too close to #8. I repeated this step – mixed just enough white paint until the gray was a shade or two darker than the cup after it – until I got the gradient I wanted between cups 1-8. Once I thought I had what I wanted, I looked at all 8 and adjusted the ones in the middle to make them a little lighter to make sure the contrast was there (like I said, had to experiment with the shades the whole time).
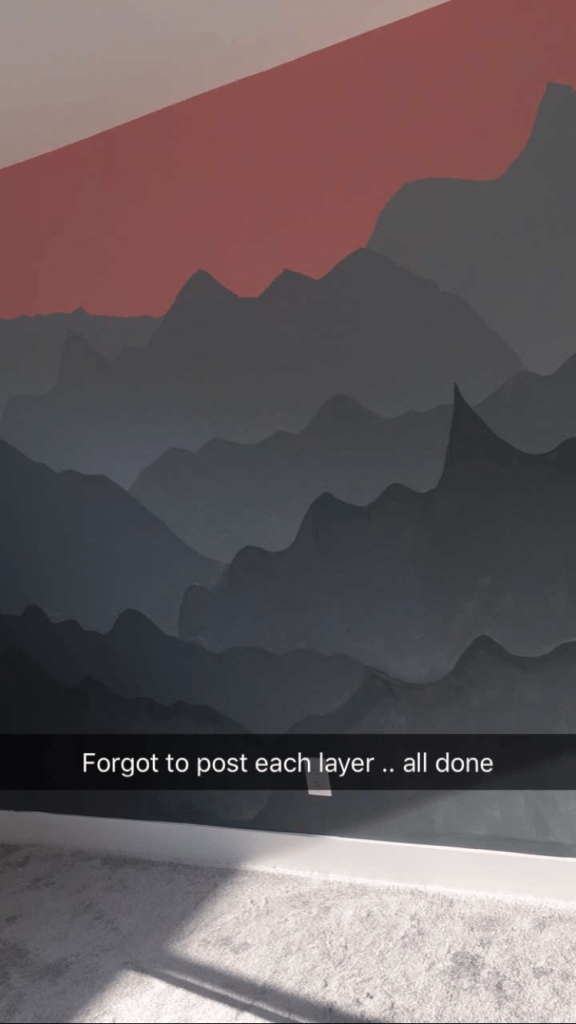
Finally it was time to paint! We put up the painters tape at the edge of the walls and on the molding, put down a plastic sheet on the carpet and started! Started at the top with “sunset sky” (it was just a solid color pink). Then went straight to the mountains with cup #8 on the two farthest mountain ranges, #7 for the one in front of those, #6 for the one on the right in front of that and so on until we go to the darkest. My husband had the roller most of the time to cover the big swaths of space and I had the small paint brush most of the time to handle the outlines and touchups. The great thing about mountain landscapes and they naturally have shadows and lighting changes so it paint strokes or heavy hands don’t really matter – it just adds depth.
About a month later, after our baby shower, I added the flowers and the vinyl sticker quote I got off of Etsy.
All the Supplies:
- Lullaby Paints in Greybeard (0528, Gray), Nosegay (1086, Pink) and White (0000): Zero VOCs, health focused for momma’s that are painting (and shouldn’t be inhaling fumes) and babies that will be sleeping around freshly painted walls or cribs. I used the white on her crib too.
- Etsy Quote: Let her Sleep for when she Wakes she will Move Mountains in Gold
- Paint Trim Kit from Home Depot: the smaller roller and paint brush helped with the details.
